# MIDI
It is really cool to the the UI of modV, but during a live gig we want to change between different modules fast. This is where MIDI comes into play, as we can use any MIDI controller that can be connected via USB to the computer in modV.
- Connect the MIDI controller to the computer
- In the
Input Device Config>MIDImake sure that your MIDI controller is shown - Select the
Enablecheckbox of any module - In the
Input Config>MIDIclick onLearn. This enables a mode where modV is listing for any MIDI input, for example the push of a button and then assigns this MIDI input to the module input that we selected before (in this caseEnable) - Push a button on your MIDI controller and see that
Learntransformed intoForget
When we now press the same button again, we can toggle the Enable checkbox of the module which makes it possible to turn on and of the module using a MIDI controller.
💡 What is still missing is a way to also create a virtual MIDI controller so we can create the layout of the hardware MIDI controller and assign labels to the different MIDI input elements (like a button or fader or knob) to see what they control in modV. We are working on this via: https://github.com/vcync/modV/issues/296
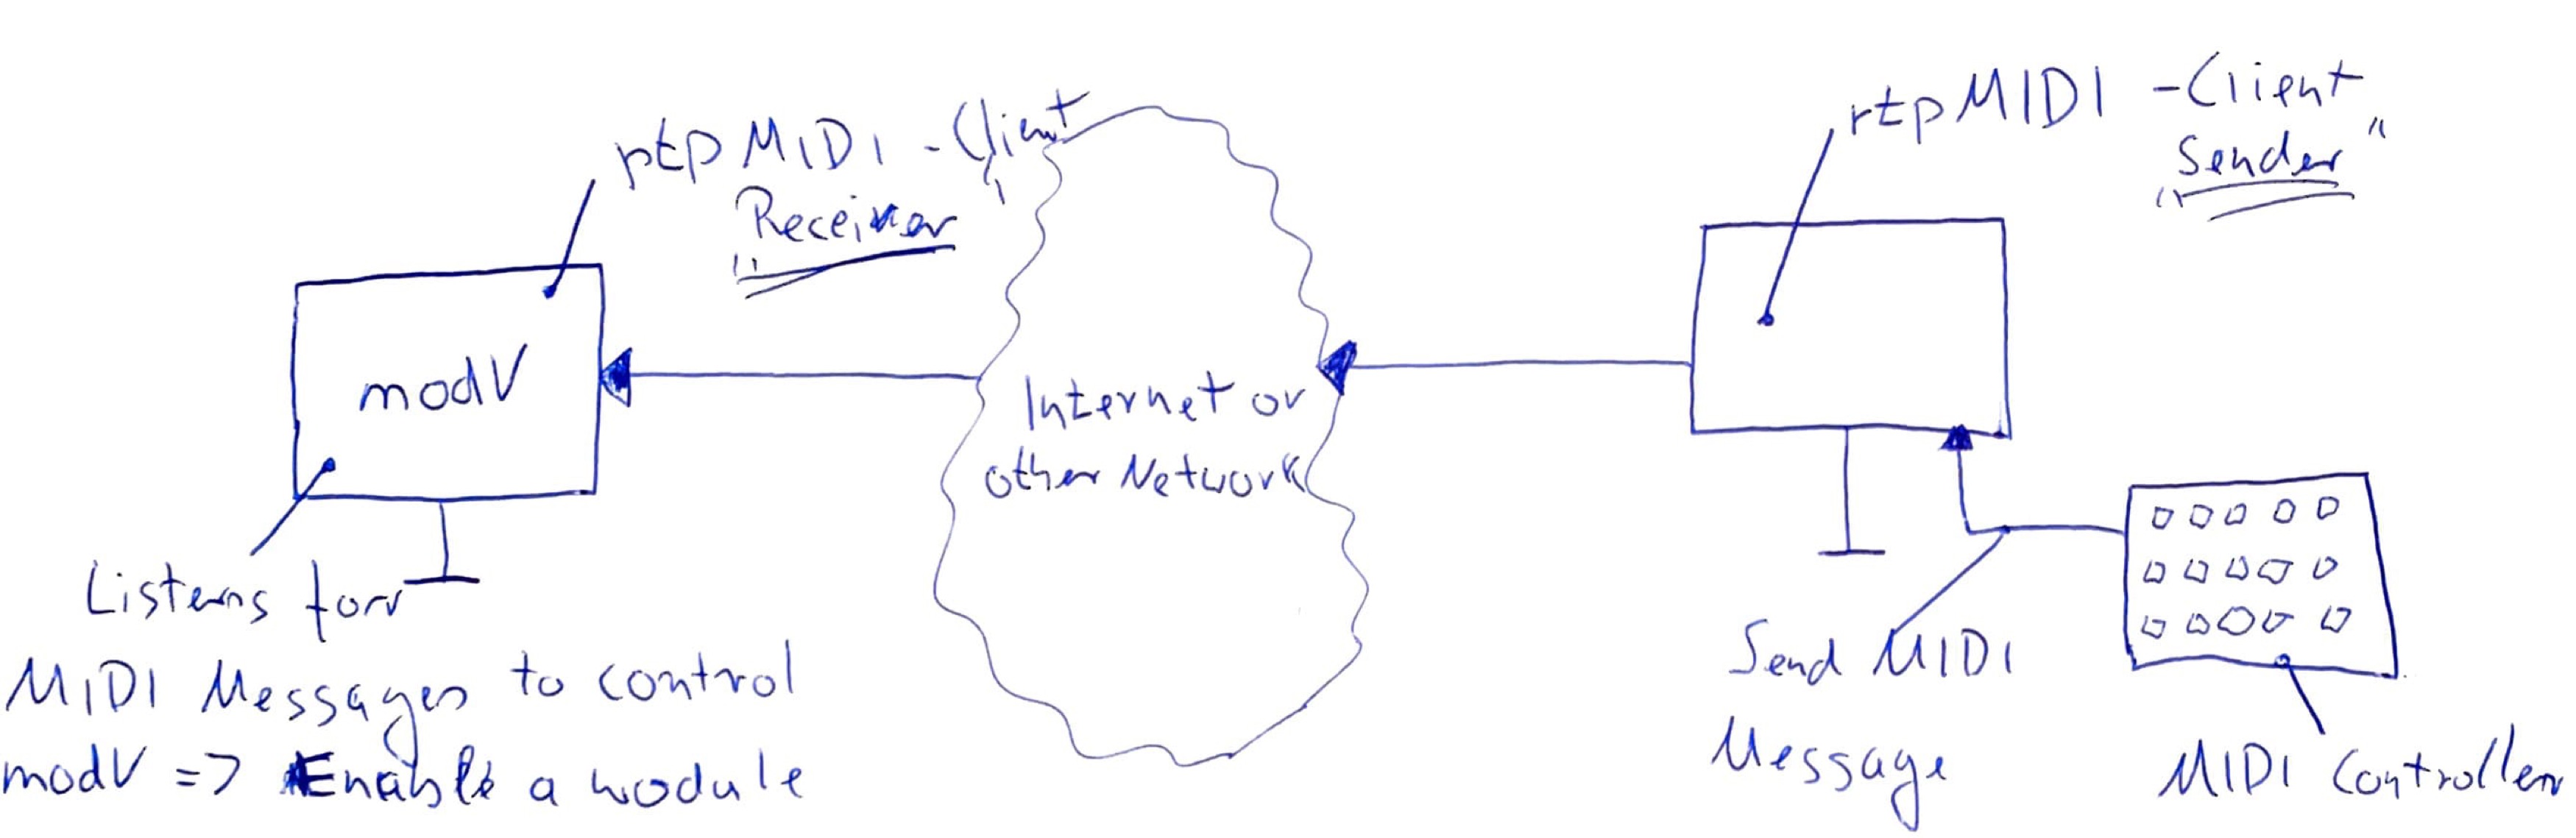
# Remote control modV using RTP-MIDI
RTP-MIDI (also known as AppleMIDI) is a protocol to transport MIDI messages within RTP (Real-time Protocol) packets over Ethernet and WiFi networks. It is completely open and free (no license is needed), and is compatible both with LAN and WAN application fields.
excerpt from RTP-MIDI on Wikipedia (opens new window)
# Prerequisites
If you are attempting to network between two computers not on the same local area network (e.g. connected though the same router) and you and your partner cannot create a VPN between the two machines, you will both be required to open ports 5004 and 5005 on your router's firewall.
Please consult your router's documentation/your ISP/a search engine on how to do this as it can be different on each router.
Once your ports have been opened, you and you partner much each note down your public IP address'. On most home internet connections your public IP will not be static and could change at any time, so watch out for that.
# System requirements
- Windows
- Mac
- It's built-in 😄
/Applications/Utilities/Audio MIDI Setup> Window > Show MIDI Studio- There's a Network globe icon on the toolbar which opens the Network Configuration
- It's built-in 😄
- Linux
- We've never tried this, but there is a package: https://github.com/davidmoreno/rtpmidid (opens new window)
# Guide for macOS and Windows
If you and your partner are on the same local network or are able to VPN between the two computers, Bonjour will auto-discover the partner machine in the Directory.
If you are not on the same network, please see the Prerequisites section above.
Add the public IP of your partner to the directory. The port number will be 5004.
Create and start a session. Add your partner from the directory to your session.
Once you're connected to each other you will see the latency update. (this sometimes is a little buggy on Windows).
Now you can route a MIDI device to the network port in the bottom right.
The top drop-down menu sends the MIDI device messages to the network session. The bottom drop-down menu sends the incoming session messages to a device connected to your computer.
To use the incoming MIDI messages from the network session in an application (such as modV, Ableton, etc.), open the MIDI configuration and select the new virtual device which should share the session name.
# Debugging
We used https://www.midimonitor.com/ (opens new window) to check for incoming MIDI messages.
On Windows, right clicking rtpMIDI and running as Administrator seemed to help, but this is not required according to the rtpMIDI documentation (opens new window).